Subscribe

RSS Feed (xml)

Powered By

Skin Design:
Free Blogger Skins

Powered by Blogger

Friday 26 March 2010

Human Modelling - Clothing

My character's role in the animation is a 'wildlife-Photographer' therefore relevant clothing and details are needed to ensure his image reflects his role..


A shirt with a white t-shirt underneath is fine - with shorts or three-quater lengths for the legs and boots to finish.

Human Modelling pt. 2

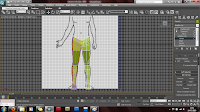
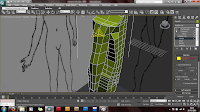
Continuing to develop my human character for the animation, I used the same methods as before to extrude / extend the leg upwards to model the knee and thigh..


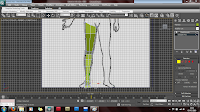
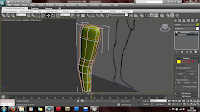
To check the shape of the leg - I applied a symmetry modifier and aligned this to the reference image, So far I am impressed with the results..


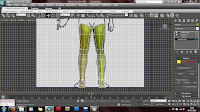
*before continuing - it was important to take the time here to reshape the leg and brush up on any areas that were abit sloppy, leaving a good clean mesh to work with later.
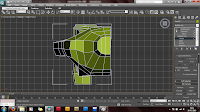

Waist / Hips

With the legs completed, the hips and groin were modelled.. again simply by selecting the polygons at the top of the model and using the extrude tool with a setting of 5-10.


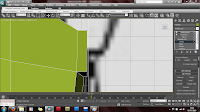
*Whenever using a symmetry modifier - making sure the inside surface (polygon / edges) are all flat saves a tremendous amount of time correctly errors when aligning the shapes.

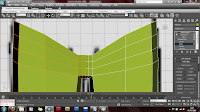
With a basic shape for the waist done.. corrections and some remodelling was done to refine the model's overall shape..


Chest

To create the middle and upper body - the top polygons on the waist section were flattened, extended with the extrude tool and carefully modelled in relation to the ref. image I was using..


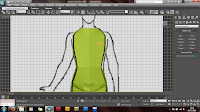
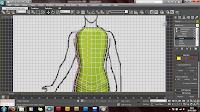
This section was fairly straightforward and required little readjustments in order to get the desired shape. The difficult part was the side view of the model.. making sure the chest features were shaped correctly.


Arms

The arm required slightly more crafting in order to define certain features such as the upper and lower arm muslces and the elbow section. Just taking the time to carefully extrude bit by bit, I was able to produce a relatively simple arm shape which is versatile when it comes to shape adjustments.


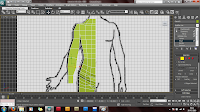
I am very happy with how this has turned out so far - this is the first time I have used the extrude tool to a large extent to create a large model like this!

Tuesday 9 March 2010

Bat Modelling pt. 3

With the 2d layout now complete, the bat model can now be given it's 3-dimensional look by pulling the vertices outwards on its Z axis. The following image shows the bat's body being expanded..


Using planes to being a model really makes this process easy, the difficult part to expanding flat surfaces is getting the desired width and shape for the final model, this is especially time-consuming when circular area's are involved such as the bat's body.

I continued this process by expanding the bat's tail, again simply pulling the vertices outwards, followed by the bat's legs..


The final area to expand is the bat's arms, I did this by selecting only the middle vertices along each arm / finger and pullingthe vertices down. I also added some additional edges here for a better result along the 'hand' section of the bat's arms.


----------------------------------------------------------------------------------------------
And the Final result so far....


-------------------------------------------------------------------------------------------------
To complete the 3d model, I used the 'border' tool to select the inner edge of the bat's body, then using the scale tool, made sure the edges were aligned correctly and flat. I did this because when it comes to using the symmetry tool, for best results you must ensure the mirrored edge is 100% flat to avoid and cuts or breaks between the mirror image and the original.

Before the symmetry tool was used however, I extruded the border edge using the extrude tool with a setting of 5.

I repeated this process for the bat's arms - I did this seperately to align the wings mid-way on the bat's body..


Friday 5 March 2010

Human Modelling pt. 1

To vary my work for this task, i have started my second model which will be a human being.

This character will be a 'Wild-life photographer' in my animation which will appear for a short period of time, interacting with a majority of the animal characters. Because of this, a slightly lower detail quality will be required due to the limited appearance time in the animation, however a high-standard of modelling will be maintained.


I started off by finding a suitable reference image - the image I found is absolutely perfect and shows 2 views of the body! The tutorial related to this section that I have been using can be found here.


Next, the image was applied to a plane in 3ds Max, using the material editor. Using the left viewport, I began creating a plane and extruding the edges on the foot which can be seen in the image above. Then continued to cover half of the leg using the same method. Following this, I selected the inner border of the leg and applied a symmetry modifier to get a complete 3d shape:


At this point, the vertices need to be shaped to properly craft the shape of a human foot, including the inside, ankle and heel areas. This took careful adjustments and the use of the 'MeshSmooth' tool to preview the end result..